Saturday, November 28, 2015

Cherry Pie--Part 2

This week I'm sharing a series of vintage recipes that are sure to turn heads at your holiday table. This post is part two of my first ever attempt to make pie from scratch. Bon appetit!

When we last were together, we were working on our first ever cherry pie. We had just rolled our crust into the piepan and were about to start on our pie filling. There were so many pies to choose from in the 250 Superb Pies and Pastries cookbook, but I picked good ol' cherry pie--no food coloring, no mincemeat, no tapioca--just plain cherry.


Cherry Pie
2 cups canned sweetened red cherries
2 tablespoons cornstarch
3 tablespoons sugar
1/8 teaspoon salt
1 cup cherry juice
1 tablespoon butter
1 plain pastry 

1) Drain cherries, saving juice. Mix cornstarch, sugar, and salt.


2) Add juice gradually and cook slowly until smooth and thickened. 


This part took a little time, but after about five minutes or so, the juice started to thicken and slide even slower off the spatula. I was ready for cherries!

3) Add butter and cherries. Cool.


4) Line piepan with pastry, pour in filling, and cover with top crust.

So simple! Because I had already made my bottom crust, all I needed to do was roll out the top crust, pour in the filling, and cover the pie for baking. My dough chilled while I cooked the pie filling, so I kept things rolling (pie pun!) by flouring my surface and working out the second half of the dough. 


Okay, I just want to pause for a minute and say that as a recovering perfectionist, pie-making is really hard.  There are about a million variables that can go wrong, and I'm in control of essentially none of them. That is a very hard truth to accept. At one point, I had to roll up my dough and start over because it just wasn't sticking together. I am pretty sure I did everything the same as with the bottom crust, but it just wasn't working for me. Whatever. Pie pity party over.

Once the top crust was rolled out, I poured the cherry filling into the piepan. It was thick and gooey, and the right amount for the pie crust. I was ready to cover my pie.


At this point, the Plain Pastry recipe we worked from last time advised "to dampen the edges of the lower crust with cold water and cover with remaining dough, which has been rolled out and slashed in several places to allow steam to escape while baking."

So that's what I did. I'm nothing if not a rule-follower.


I placed the top dough ever-so-gingerly on top of the pie, then crimped the edges with a fork to help hold it all together. Because my dough wasn't perfectly round (deep breaths), I also needed to trim the edges with a knife.


 5) Bake in very hot oven (450 degrees F) for 15 minutes; reduce to moderate (350 degrees F) and bake about 25 minutes longer. 


This was a moment of truth for me. My first ever pie, heading into the oven. No turning back. What's done is done. After an agonizing 40 minutes, it was time to retrieve my freshly-baked pie.

Look how beautiful! The crust is golden brown and the pie is in tact. I was over the moon!


But how would it taste? We had to wait a while for our first bite, as this pie was already claimed for our church's Sunday potluck and we couldn't cut into it just yet. By the time we made it through the serving line, several pieces were already gone, but we managed to cut a little piece for testing. We took the slice back to the table, and it was incredible!


The crust was flaky, the filling held together, and the flavors were great. It wasn't too sweet or too tart--it was just right! At least, we thought so, anyway. The real test would come a few days later when I made the pie again for our family's Thanksgiving dinner. It was just as unpredictable, time-consuming, and stressful as the first time I made it, but the pie looked decent enough. I just hoped it would taste good, too!

I knew our relatives would be polite and eat the pie and say nice things, but I was seeking one vote of approval, in particular. Back in August when I started this blog, my dad had specifically requested I make him a cherry pie, so I was most anxious for his reaction. It was the only dessert he ate that night, and I'm pleased to say it got the official Head Nod of Approval. (And a pat on the back, and a hug, and a lot of other really nice words. He's my dad, and he loves me. And he loves Sheila. And pie.)


And with that, I'm officially a pie-maker! Only 249 more kinds to make. I think I know how I'll be spending the winter...

Friday, November 27, 2015

Cherry Pie--Part 1

This week I'm sharing a series of vintage recipes that are sure to turn heads at your holiday table. Bon appetit!

When I started this blog three months ago, I figured I would make a few dozen cookies, a couple of weird dips and spreads, and maybe a pot roast or two for good measure. I'd learn a few basic kitchen skills, write a few puns, and see what happened. In the back of my mind, though, I knew I could reach higher. I could play it safe or I could go for gold--I could make a pie from scratch.

Though I've never made a pie in my life, somewhere deep down I knew this was my destiny. The olives, the bananas, the cottage cheeses--all had prepared me for this moment. As had the half dozen trips to local antique shops in search of vintage cookbooks these past few months.

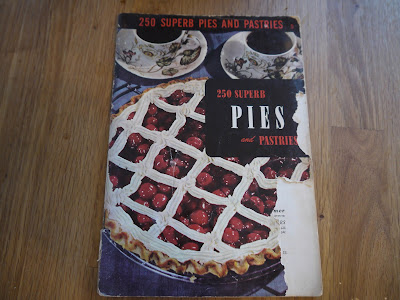
On one such excursion to the Grand Antique Mall, I wandered into the booth of a kind local vendor who showed genuine interest in my new vintage cooking blog. Before I knew it, my new friend Susan had given me this book of 250 Superb Pies and Pastries:


And for the past week or so, this little cookbook has become my beloved pie bible. Before measuring even one cup of flour, I carefully reviewed this introduction to pastry-making.


Here are the highlights:
  • Good pastry is flaky, tender, delicate, and evenly browned. To achieve this result the cook must be quick and "light-handed," since pastry cannot be good if handled roughly or slowly.
  • Everything must be cold. Chilled ingredients are important for success and for the beginner even the flour may be chilled. A cold, solid fat and ice water are essentials.
  • How much water. No definite amount can be specified since this varies with the dryness of the flour and the amount of shortening used...Avoid stirring or mixing that would crush the fat particles and blend them with the flour...Too much moisture makes the crust hard and brittle. Too little makes a crust which cracks at the edges while being rolled.
  • Be swift and deft. Roll quickly but lightly since heavy pressure makes the pastry stick and breaks the surface. Start each stroke at center of dough and roll to edge, keeping pastry in as circular a shape as possible and keeping edges as thick as the center.
And if those tips aren't helpful enough, here are a few more to inspire confidence in the beginner:
  • If too little or too much water has been used, nothing can be done about it, except to profit by experience next time.  
  • Piecrust mixtures, containing all ingredients, except the water, can now be purchased. They are especially valuable for the inexperienced cook and small family.
At that moment I decided this pie book would not define my future. Though inexperienced, I would not be defeated. I would not buy a pie crust. I would do this thing and it would be glorious. The rings were coming off. It's go time!


Plain Pastry
2 cups sifted flour
3/4 teaspoon salt
2/3 cup shortening
4 to 6 tablespoons cold water

1) Sift flour and salt together and cut in shortening with 2 knives or pastry blender. 


I started by cutting my shortening into smaller bricks, which I gradually dropped into my [very cold] flour and salt mixture. I don't have a pastry blender, so I crossed two knives through the mixture to break up the shortening. According to the cookbook: "It has been mixed sufficiently when the largest pieces of fat are the size of small peas. These particles roll out and melt into crisp flakes."

2) Add water using only a small portion at a time, until mixture will hold together.


This little measuring cup holds up to 4 tablespoons of water, which was just enough for this delicate operation. I added a splash of water at a time, being careful to evenly distribute the water while not over-working the dough. I think I ended up using a total of 7-8 tablespoons of water when it was all said and done--and I sweated every single one.

3) Divide dough into 2 parts. Roll out on floured board to desired size.

 
I don't have a pastry board, so I just lightly floured my kitchen counter and gently rolled out half of my dough for the crust. I held my breath the whole time, adding the occasional sprinkle of water or flour to keep things moving. It is probably for the best that you could not see my face during this part.

4) Line the piepan with one piece of dough, being careful not to stretch dough.


This was the most delicate, fear-inducing part of the whole process. I used a spatula to gently loosen the dough, and then recruited Taylor to help transfer it to the pie tin.


Victory! Between our four hands, we successfully landed the dough in the tin without stretching it, tearing it, or dropping it. If I remember correctly, I was half-crying, half-laughing at this point, and seriously considering making a career change to cardiac surgery. Or at least entering a pie contest at next year's county fair.

But we're only half way through the process with much more work to do. So much can still go wrong! Come back soon to judge for yourself whether this pie turned out to be worthy of the blue ribbon.

To be continued...

Wednesday, November 25, 2015

Cranberry Orange Relish

With Thanksgiving just around the corner, this week I'm sharing a series of vintage recipes that are sure to turn heads at your holiday table. Bon appetit!

Do you have unusual food traditions at your holiday feast? Like creamed pearl onions, or tomato aspic, or jello salad? There's always one relative who insists it just isn't [insert holiday here] without the [insert weird recipe here]. And so the tradition continues even though no one really likes it or even knows where it came from.

Tomorrow, both of our families will come together for a combined Thanksgiving meal. Instead of driving across the state for two different family dinners, we've implemented a new custom that blends two families and two sets of traditions. We don't serve anything too off-the-wall, but we do have some special requests that may or may not be accommodated, depending on interest, ability, and demand. For example, my dad likes oyster dressing, but I'm pretty sure he's the only one, so that dish likely won't make the cut this time. A handful of us enjoy green bean casserole, so with a critical mass of green bean lovers, that one's a go. And though I don't think there's anyone who particularly loves cranberries, they're so easy to make that there's no good reason not to include them on the table. So there.

If you don't have a cranberry relish recipe for your table tomorrow, feel free to borrow this one from Fascinating Cranberries and How to Serve Them. Printed by the American Cranberry Exchange in 1936, "this little book is given to you that you may have tried and tested cranberry recipes for handy reference."


Cranberry Orange Relish
(No Cooking)
The aristocrat of relishes. Particularly good with all meats, hot or cold. 

1 pound (4 cups) cranberries
1 to 1 1/2 oranges
2 cups sugar

Method: Put cranberries through meat grinder. Pare orange with sharp knife; remove seeds; trim off white membrane (leaving the pulp exposed on the surface). 


Remember when we made sweet potatoes in orange shells? I saved the leftover pulp for just this occasion. Waste not, want not.

Put rind and pulp through grinder, mix with sugar and berries.

 
I should mention a few adaptations here. First, I used a food processor, not a meat grinder for this recipe. Because it's 2015 now.

Second, I halved the sugar called for in this recipe. Keep in mind, this recipe came from the 1930s--a time before WWII food rations. A time when sugar rained from heaven above. Or something. But just because one has two cups of sugar, does not mean one needs two cups of sugar. Except we actually didn't have two cups of sugar; we ran out after pouring in one cup. So we didn't really have a choice this time, but we totally would have chosen to cut the sugar even if we'd had 10 cups available.

Let stand before serving. For future use pour in glasses, cover with paraffin.


I poured the relish in a couple of mason jars and stored them in the fridge, ready for Thanksgiving dinner tomorrow. So easy, so pretty! I imagine we'll have a lot leftover, but l don't care. It isn't really Thanksgiving without the cranberry sauce.

Tuesday, November 24, 2015

Whipped Sweet Potatoes in Orange Shells

With Thanksgiving just around the corner, this week I'm sharing a series of vintage recipes that are sure to turn heads at your holiday table. Bon appetit!

Before there was Pinterest, there were vintage cookbooks. Remember that article I shared earlier this month from the NY Times Magazine? Presentation is everything.

So today we're going to take a simple, traditional recipe and jazz it up just in time for Thanksgiving!


Whipped Sweet Potatoes in Orange Shells
(serves 8)
8 Sunkist oranges
4 cups boiled or baked sweet potatoes
2 teaspoons salt
2 tablespoons melted butter
8 marshmallows


1) Cut off tops of oranges and remove pulp and juice with a sharp knife and spoon.


Don't let the length of this sentence fool you. This step is the most time-consuming part of the whole recipe, but it's worth it! I used a small, sharp knife and an ice cream scoop to hollow out each orange shell. This part took about 40 minutes, but I also stopped a few times to take photos and check Instagram, so who knows how long it actually takes.


At this point, you may be wondering why we're spending so much time on preparing oranges when this is supposed to be a sweet potato recipe. Well, this recipe comes from the California Fruit Growers Exchange in 1940, so yeah, oranges are going to take a starring role on this one.


2) Whip sweet potatoes with salt, butter, and orange juice to moisten to desired consistency. Use juice secured in preparing shells.

Because I used the bulk of my time hollowing out orange shells, I decided to get a few minutes back by going with canned yams for this step.


Best decision ever! In no time, my sweet potatoes were soft and mashable. I stirred in the melted butter, orange juice, and salt, and added a few pinches of brown sugar for good measure.


(P.S.--All of that leftover orange pulp didn't go to waste. Come back tomorrow to see how you can put the remaining orange pieces to use!)

3) Fill orange shells and top each with a marshmallow. Brown in moderate oven until heated through.

Because I was taking this dish to share at Friends-giving, I decided to hold off on the last step until I arrived at the party. Speaking of, take a look at this tablescape! Sunkist isn't the only one who knows the art of presentation. My friend Amanda knows how to set a table!


Before we ate, I scooped the sweet potatoes into the orange shells and placed a marshmallow on each. After a few minutes in the oven, the marshmallows melted on top of the warm, fluffy sweet potatoes and were ready to be served. 


I must say an orange shell is a clever way to serve just about anything. It's a tidy single-serving container to keep the sweet potatoes from encroaching on a crowded plate of goodies. And they're just so darn cute!

Monday, November 23, 2015

Blushing Pink Chip Dip & "Teeners" Special Dunk

With Thanksgiving just around the corner, this week I'm sharing a series of vintage recipes that are sure to turn heads at your holiday table. Bon appetit!

When I was a kid, cottage cheese was a staple in our household. For as long as I can remember, my mom would add a spoonful of cottage cheese to pretty much anything she ate--mashed potatoes, corn, green beans, chicken--and so I did, too. When I later moved away from home and ate dinner with other people, I quickly realized that my level of cottage cheese consumption was not entirely normal, and so it significantly decreased. Some day, I thought, I'll help others find a love of cottage cheese, too.

So imagine my delight upon discovering this cookbook in one of my favorite booths at the local antique mall:


"This cookbook is filled with delicious surprises for you," reads the first paragraph. "Though you are familiar with cottage cheese, you will discover many more exciting ways to use this dairy food." 


Finally, an entire cookbook featuring the delicious dairy delicacy! Jackpot! This book was written for me and the people I love.

Last week I was invited to a Friends-giving dinner party, so I decided to test out a couple of the cottage cheese-based appetizers. First up, a pretty little chip dip!


Blushing Pink Chip Dip
Yield: approx. 1 cup

1 cup small curd cottage cheese
1/4 cup Parmesan cheese
2 tablespoons chili sauce
1 tablespoon chopped parsley


In a mixer or blender combine all ingredients and beat until smooth. Chill.

An interesting combination of ingredients, but simple enough! First I chopped a little bit of fresh parsley--one tablespoon, to be exact.


Then I poured all of the ingredients into my food processor. So easy. At this point, I'm feeling like I'm on Top Chef, and I'm convinced that I will make this recipe every day, no matter how it tastes. Because it's easy and I can.


Once it was all mixed together and smooth, I poured it into a bowl with a handful of chips. My sneaky little sidekick looked on. Nice try, Sheila.


The dip wasn't really blushing per se, but it looked legit so I went for it. It was a sturdy little dip, with a hint of tangy sweetness from the chili sauce. Overall, not bad!

At Friends-giving, I asked my unsuspecting friends to taste the dip and guess its ingredients. Here are a few of their observations:
"It tastes hummus-y. Is it hummus?"
"I like it."
"Sour cream?"
"It's kind of like pimiento cheese."
"It's good, though."
Overall, I'd give it a B+. Everyone ate it, no one hated it. When I named the full list of ingredients, everyone nodded like, "Oh yeah, I could see that." Some even went back for more! It was a proud moment for cottage cheese.

Now, in hindsight, I should have stopped there while I was ahead. But like Icarus, I pushed on toward the sun, insisting on making one more cottage cheese concoction. This one was mysteriously named:

"Teeners" Special Dunk
Yields: approx. 2 cups

1 1/2 cups small curd cottage cheese
1/3 cup peanut butter, creamy style
2 tablespoons milk
1/4 cup catsup
3 tablespoons sweet pickle relish


First just let me say, it's got a pretty weird name with no context. Red flag #1. Second, it's got a strange line-up of ingredients. I know of no other recipes that would combine these ingredients in the wild. Red flag #2.

1) In a mixer or blender beat cottage cheese and peanut butter until smooth.


2) Add remaining ingredients and mix well. Chill. Good with celery sticks.
With each new ingredient, it looked and smelled worse. I think the relish chunks were the last straw for me. Red flag #3.


Once it was sufficiently blended, I poured it into a little dish and fanned out some celery sticks as instructed. Something just didn't feel right about this recipe, but still I persisted to the end. And, sure enough, it was awful. It tasted just like a nutty thousand island dressing, which is not a great flavor combo at all.


Against all better judgement, I asked my friends to participate in another taste test. Could they identify the ingredients in this recipe? Here's what they had to say:
"I taste peanut butter."
"Yes this is very peanut buttery."
"I don't think it's terrible. I wouldn't want to eat it all the time."
"It's a weird one."
"I can't quite pinpoint it."
"All I can taste is the peanut butter."
"I actually like cottage cheese a lot, but...."
What have I done!? These are supposed to be my friends and I've willingly fed them garbage! Curse you, Teeners and your stupid dunk! What a bust. If I had to give this recipe a grade, it would have barely scraped by with a D- because I'm a generous grader with a kind heart. (Just kidding, I'm actually a pretty ruthless grader. I just didn't want to see this dish in summer school.) If I had to identify its downfall, I'd probably point the finger at the peanut butter. Its inclusion with the ketchup and relish was just too confusing for the modern palate.

I am relieved to report that I didn't lose any friends that night, though I did take home two more cups of Teeners Special Dunk than I would have liked. Don't worry, family members, I learned my lesson. These won't be in tow at Thursday's meal.

Well, maybe just a little Blushing Pink Chip Dip, because, you know, I still <3 cottage cheese.

Tuesday, November 3, 2015

Pan-Fried Bananas

You know that feeling you get when you want to eat something but no one is around to cook you food? This happens to me almost every day. Instead of feasting on my large stash of leftover Halloween candy, though, today I decided to try a new vintage recipe.

I looked in the kitchen to see what sounded good. I spotted some bananas and thought I could probably make something quick and easy from the Chiquita Banana's Recipe Book and I was right! Here is my interpretation of:

Pan-Fried Bananas

1) Peel four firm bananas. 


Or maybe just peel one banana because I'm not sure how this is going to turn out. Also because I'm only making this for myself and not a party of four. Though fried bananas probably wouldn't be my first choice of party food even if there were four of us here.

2) Keep whole or cut crosswise into halves. Fry bananas slowly in butter or margarine until tender...easily pierced with a fork...turning them to brown evenly. 


3) Sprinkle lightly with salt. Serve hot as a vegetable. Four servings.

Serve hot as a vegetable? What does that even mean? As opposed to a mushy lukewarm fruit? How is this banana going to transform into a vegetable just because I let it spend some time in a skillet with butter? I looked again to the photo for help and noticed this notation under the recipe:


IMPORTANT: Pan-Fried or Broiled Bananas, served as a hot vegetable, are excellent flavor partners with fish, meat, poultry or eggs for luncheon or dinner. Pan-Friend Bananas with hamburger patties and whole carrots make an appetizing, colorful and nutritious plate combination.

So it's about what you serve it with. Okay. I looked again in the fridge and found some sausage patties and baby carrots. Close enough--let's do this!


At the bottom of the page there was another recipe for "Bananas Pan-Fried with Ham and Eggs" where I read this note/variation:

Sausage or bacon may be used in place of ham but should be fried separately. Sausage or bacon and cooked bananas make an excellent flavor combination. 

And you know what? They're right! All in all, this weird little plate of food tasted pretty good! There's something about the salty sausage and the sweet banana that's really good together. I'm not sure where the carrots come in, but I guess it added a little veggie legitimacy to this dish.

I might make this again sometime--after all, who isn't looking for good vegetable recipes?